Decontamination
Note:
The Bladder Pump has been decontaminated before leaving Solinst, however, you may wish to decontaminate your pump before use. The pump should be decontaminated between wells.
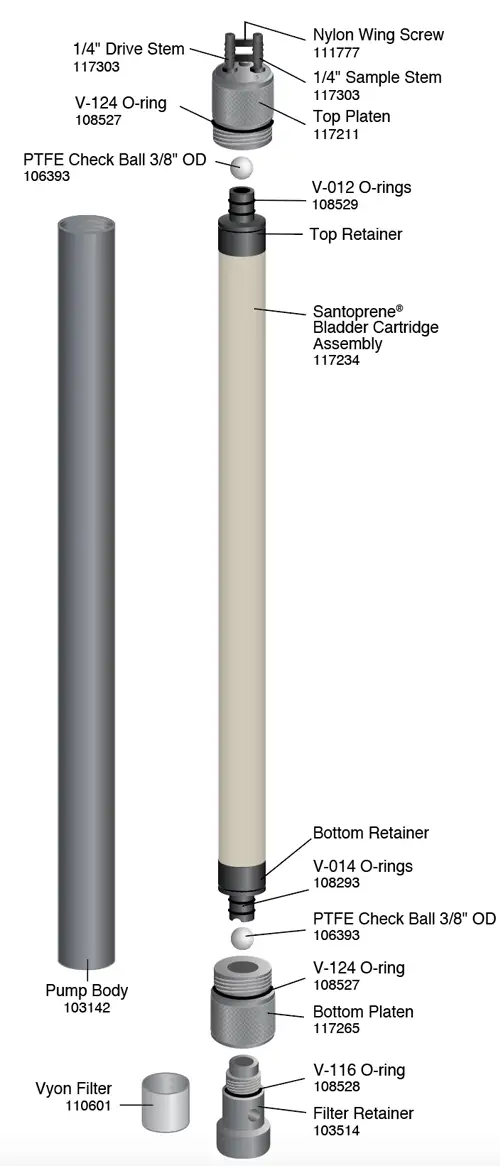
- Completely disassemble the pump. See Disassembly section.
- Wash all pump components with phosphate-free soap or a detergent.
- Rinse all components thoroughly with deionized water.
- Replace any worn O-rings and Bladder if necessary, and reassemble. We recommend replacing Bladders between wells, or as needed.
Disassembly
- Unscrew and remove the Filter Retainer, Vyon Filter and Top and Bottom Platens, being careful not to lose the Check Balls.
- Remove the Bladder Cartridge from the Pump Body.
Reassembly
- If necessary install new O-rings on both Top and Bottom Retainers and both Platens. (Total of 7).
- Put the Vyon Filter over the Filter Retainer. Screw the Filter Retainer into the Bottom Platen.
- Drop the 3/8" OD PTFE Check Ball into the Bottom Platen. Do not force the ball in, as the correct ball should drop in easily.
- Fit the Bottom Retainer of the Bladder Cartridge Assembly firmly into the Bottom Platen. (Bottom Retainer has a notched end).
- Slip the Pump Body over the Bladder Cartridge Assembly and screw it onto the Bottom Platen.
- Drop a 3/8" OD PTFE Check Ball into the Top Platen and screw the Pump Body onto it.
- Shake the assembled pump to hear if the Check Balls rattle. If not, repeat the steps to ensure that the Check Balls are positioned correctly.


